Vorschau

Making school cones

Tips and crafting instructions for individual school cones

Text last updated: 2024-06-14

With these instructions, your child's school cone will be an original

School enrolment and the first day of school are a very special experience for many children and their parents. One thing that should definitely not be missing: a school cone, sometimes also called a sugar cone!

While school cones are available to buy, they are still the best to make yourself. There are virtually no limits to your imagination and creativity. Our suggestions and instructions make crafting a breeze.

A pretty, cool school cone, tailored to personal interests and preferences, will make your child particularly proud and help ensure that the first day of school will be remembered fondly for a long time to come. The shopping list is straightforward and you're ready to go.

Material list

Depending on the template or your own ideas for the design, you will need the following craft materials:

Image
  • Colored photo cardboard or clay paper (size e.g. 70 x 100 cm)
  • Colored crepe or tissue paper - preferably waterproof
  • Depending on the model: colored felt, metal foil, corrugated cardboard
  • A pencil
  • A cord or a sturdy thread, e.g. 70 cm long
  • Scissors
  • Colored pens
  • Colored ribbon
  • Liquid craft glue, double-sided adhesive tape or hot glue gun
  • Decorative materials such as masking tape, confetti, scraps of paper, colorful pompoms, glitter, stamps, stickers, etc.

School cone blank and school cone closure

Image

The blank is the basis for all school cones. You will need a colored cardboard or sturdy colored cardboard. The larger the cone is to be, the larger the cardboard or paperboard needs to be: For a school cone up to 70 cm long, you need 70 x 100 cm.

Crafting instructions for the blank

  • Lay the cardboard horizontally in front of you.
  • Fasten an approx. 70 cm long thread to a pencil.
  • Place the tip of the pencil on the top left corner.
  • Then pull the thread tightly to the bottom corner and secure it there with a finger.
  • Now you can draw a large quarter circle (similar to using a compass).
  • Cut out this section of the circle.
  • Roll the cut-out quarter circle as tightly as possible into a bag.
  • Now glue the bag together and the school cone blank is finished.
  • The cone will be more stable if you additionally reinforce the top.

Crafting instructions for the closure

The school cone closure is often made from waterproof crepe paper. You can attach the crepe paper to the top edge of the inside with craft glue, double-sided adhesive tape or a hot glue gun and tie it together with a pretty, colorful ribbon.

In search of the most beautiful motif

Once the blank is ready, it's time to get creative.

What themes are popular with your child at the moment? Should the school cone remind you of your son's favorite ice cream or pick up on your daughter's favorite sport? Does your child love dinosaurs, dragons, horses or outer space? Let your imagination run wild when choosing the motif, there are no limits to the decorative design. Stick felt, confetti or glitter, stickers or stickers on the school cone to your heart's content. Paint or draw.

Three ideas for crafting

Would you like some inspiration? Perhaps there's a favorite motif among the following designs that you can inspire your son or daughter with. Then get started right away!

Strawberry school cone

Image

Use red construction paper for the blank and green crepe paper with a green ribbon for the closure. For the strawberry dots, cut out teardrop-shaped yellow shapes and stick them evenly distributed on the blank. For the stem base, take a green cardboard and cut triangles into it up to half the height. Glue the edge to the outside of the blank.

School cone ice cream

Image

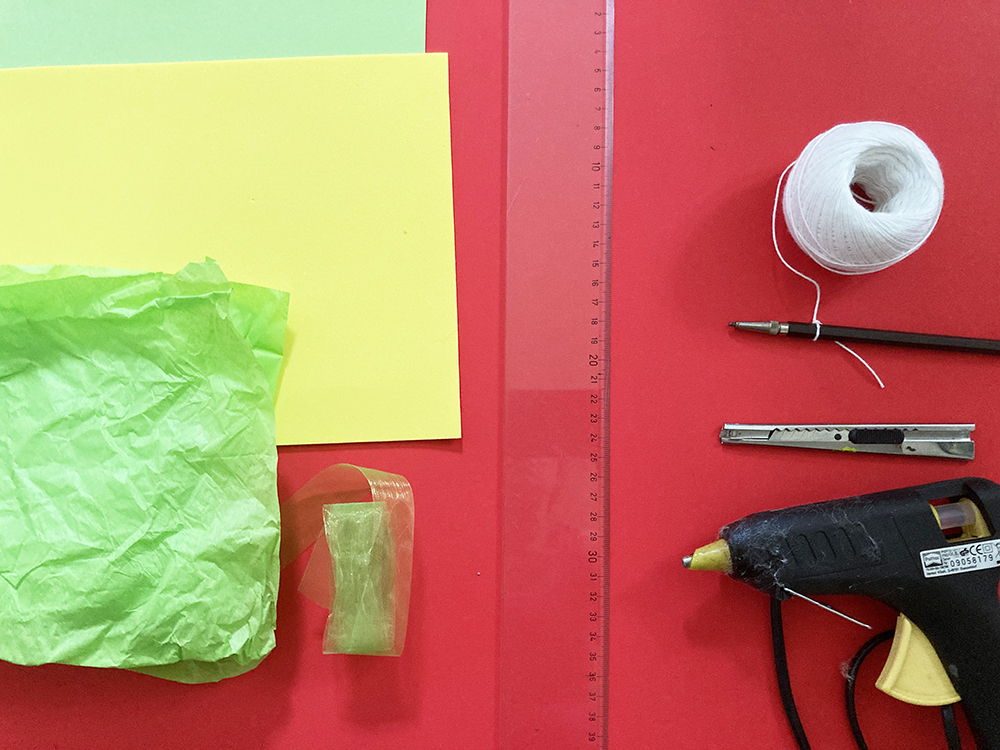
Lemon, blueberry, woodruff: Which flavor would you like? For the blank, choose a piece of construction paper in the color of your child's favorite ice cream flavor.

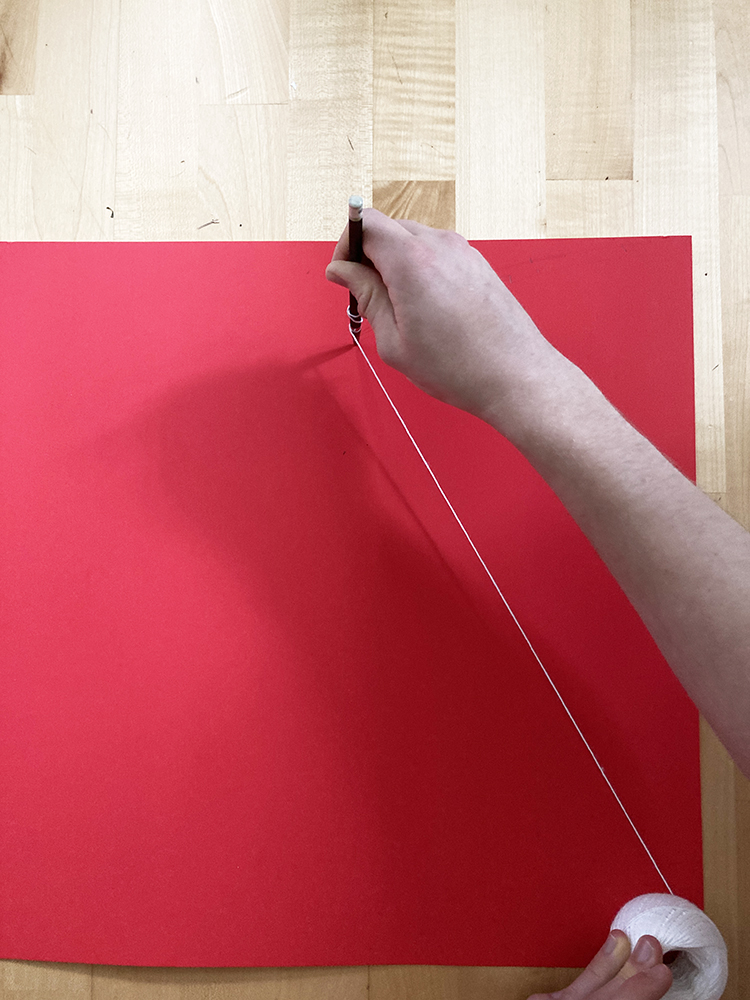
For the cone tip, draw a quarter circle with a radius of approx. 10 cm on construction paper in a different color, cut it out, glue it together on the outside to form a cone and stick or glue it to the tip. Glue on more narrow strips of colored paper in the desired colors. For the waffle pattern, stick on strips in a diamond pattern using masking tape in white or pastel colors. You can decorate the blank to your heart's content with small, differently colored pompoms.

The ice cream can run down the top edge of the cone. To do this, cut a wavy paper sleeve out of cardboard in bright colors and glue it in place. For the closure, stick crepe paper to the inside edge and close with colorful ribbons.

Rocket school cone

Image

The blank is made from sturdy silver-colored clay paper, the side wings can be made from corrugated cardboard or plain cardboard in A4 format. For the tip of the bag, draw a quarter circle with a radius of approx. 10 cm on the metal foil, cut it out, glue it together with the blue side on the outside to form a bag and stick or glue it to the tip. If you like, glue another colorful strip of red paper around it, for example. For the window, cut a circle out of metal foil and stick it in the desired place. Finally, glue the blue crepe paper to the inside of the edge for the closure. You can use yellow and orange ribbon to tie the ribbon to resemble a fire tail.

The rocket can be decorated with glued-on stars or other space stickers - just as you and your child like it.

And what goes into the school bag?

Once the school cone is ready, the important question is how to fill it. Our tip: As little sweets as possible! There are many great alternatives. We have collected some ideas and suggestions for you:

  • Healthy instead of sweet:
    - Muesli bar
    - Dextrose
    - Nut mix
    - Energy balls
    - Dried apple slices
    - Wholemeal cookies in the shape of letters
  • Useful things for the start of school:
    - Bread box
    - Fruit box (apple, banana)
    - Muesli-to-go cup
    - Drinking bottle
    - First reading book
    - Neck pouch or wallet for small change
    - Key ring, lanyard
    - Nice colored pencils, glitter pens
    - Bookmark
    - Stamp "This book belongs to:..."
  • Small toys:
    - Lucky bracelets
    - Lucky charm/guardian angel
    - Encouraging cuddly toy
    - Friends book
    - stickers
    - Glitter pens
    - Blinki
    - Reflective bands for arms and legs
    - Reflective scarf for the dark season
    - Card game
    - Motif handkerchiefs
  • For the breaks:
    - Flummi
    - yoyo
    - Skipping rope
    - Rubber twist
    - marbles
    - Road chalk

Der erste Schultag steht kurz bevor? Diese Checkliste für die Schultüte bietet eine nützliche Übersicht für den Schulanfang. Sie enthält zahlreiche Empfehlungen für Geschenke und Utensilien, die für einen gelungenen Start ins erste Schuljahr sorgen.